How to Install ComfyUI: Portable, Desktop, Windows, Mac, and Linux
 Leah Childers
ComfyUI is an open-source, node-based graphical interface built to streamline the creation and execution of complex generative AI workflows, especially for tasks like image, video, and audio generation. Its modular design lets users build and manage AI pipelines through a visual interface, reducing the need for deep coding skills while still providing powerful capabilities.
However, ComfyUI can be a bit tricky to install due to the large number of installation methods and the differing system requirements between the methods. In this tutorial, we provide a comprehensive step-by-step guide to the following:
- First, how to install ComfyUI on any modern computer using the desktop application, Windows portable version, or manual installation.
- Pros: Free, runs on your personal system
- Cons: Resource intensive, does not run on all systems, requires a GPU for reasonable use
- Second, how to run ComfyUI on cloud platforms.
- Pros: By far the easiest option, does not use your system’s resources, GPU acceleration, limited free access
- Cons: Limited free access
ComfyUI can run on Windows, macOS, and Linux, but the best installation method depends on your operating system, GPU, and whether you want a simple desktop app or a more flexible manual setup.
If you are on Windows and want the fastest path, use the ComfyUI portable build. If you are on macOS, use the Desktop app if you have Apple Silicon, or use the manual install for more control. If you are on Linux, use the manual installation path so you can choose the right Python, PyTorch, CUDA, ROCm, or CPU setup for your machine.
This guide walks through each option, explains the system requirements, and covers common problems like missing models, GPU support errors, and the local 127.0.0.1:8188 address ComfyUI opens after launch.
Which ComfyUI Installation Method Should You Use?
| Method | Best for | Supported OS | Difficulty |
|---|---|---|---|
| Desktop app | Fastest install for supported machines | Windows, macOS Apple Silicon | Beginner |
| Windows portable | Latest ComfyUI with bundled Python | Windows | Beginner to intermediate |
| Manual install | Full control over Python, PyTorch, CUDA, ROCm | Windows, macOS, Linux | Intermediate |
| Cloud GPU | Larger models, video, upscaling, repeatable production jobs | Browser-based | Intermediate |
ComfyUI System Requirements
ComfyUI supports Windows, Linux, and macOS. For practical performance, you usually want a supported GPU:
- NVIDIA GPU: best-supported path on Windows and Linux through CUDA.
- AMD GPU: supported on Linux through ROCm, with newer experimental Windows/Linux support depending on GPU generation.
- Apple Silicon: supported on M-series Macs through Metal acceleration.
- CPU-only: works for testing, but generation will be much slower.
For most image workflows, 8GB of VRAM is a comfortable starting point. Larger models, video workflows, upscaling, ControlNet, and multi-stage workflows may need significantly more VRAM.
How to Download ComfyUI Portable for Windows
ComfyUI Portable is a self-contained Windows package with its own embedded Python environment. It is the easiest option if you want to avoid setting up Python manually.
- Download the Windows portable package from the official ComfyUI installation docs.
- Extract the archive with 7-Zip.
- Open the extracted ComfyUI_windows_portable folder.
- Run run_nvidia_gpu.bat if you have an NVIDIA GPU, or run_cpu.bat for CPU-only mode.
- When ComfyUI starts, open the local URL in your browser.
If the GPU version does not launch, update your NVIDIA drivers and confirm that your GPU is supported by the bundled PyTorch/CUDA version.
Why ComfyUI Opens at 127.0.0.1:8188
After ComfyUI starts, it usually opens a local web interface at http://127.0.0.1:8188. This does not mean ComfyUI is hosted publicly. 127.0.0.1 is your own machine, and 8188 is the local port used by the ComfyUI server.
If the page does not load, check that the terminal process is still running and that another app is not already using port 8188.
Local Installation
System Requirements
ComfyUI is available for all operating systems and GPU types, however the method for installation changes depending on your specific system. ComfyUI highly recommends using a dedicated GPU, though it will work without one, massively sacrificing speed. Many users find the application unusable in CPU mode, although some are able to run it very slowly.
ComfyUI can be installed in three different ways:
- Desktop Application (Windows/macOS): Currently in Beta
- Windows Portable (Windows only): Standalone version for Windows
- Manual Installation (Windows, macOS, Linux): Installed by cloning repository on Github.
All three options have similar system requirements:
- Operating system:
- Windows: 10/11
- macOS: 12.3 or later for Apple Silicon, 10.15 of later for CPU only
- Linux: most modern distributions
- GPU: A GPU is highly recommended, although all three installation methods will work without one with proper configuration.
- Manual installation: Any GPU type with any operating system will work
- Desktop application and Windows Portable:
- Windows: NVIDIA GPU with CUDA support
- macOS: Apple Silicon (M1 or later). Intel-based Macs not supported in desktop application, should use manual installation
- RAM: 16-32GB for Windows desktop app, 8-16GB for every other option
- Storage: SSD strongly recommended for faster load times with sufficient disk space for the installation, models, and outputs (50-100GB free)
If your machine cannot host ComfyUI, there are some excellent cloud-based options discussed later in the article.
Desktop Application Installation
The desktop application download links for Windows and Mac are located on ComfyUI’s website. ComfyUI also provides very detailed installation guides for the desktop application complete with pictures of each step. This can be very helpful if you run into unexpected issues, especially since the application is still in Beta so the installation process may change, and other guides such as this one may be inaccurate in the future.
As discussed earlier, a dedicated GPU is highly recommended for reasonable runtimes, although both desktop applications can be installed and used without a GPU with some additional configuration.
Windows | Installation guide
1. Install the Windows version on the ComfyUI downloads page and open the installation package.
2. Select the GPU setup.
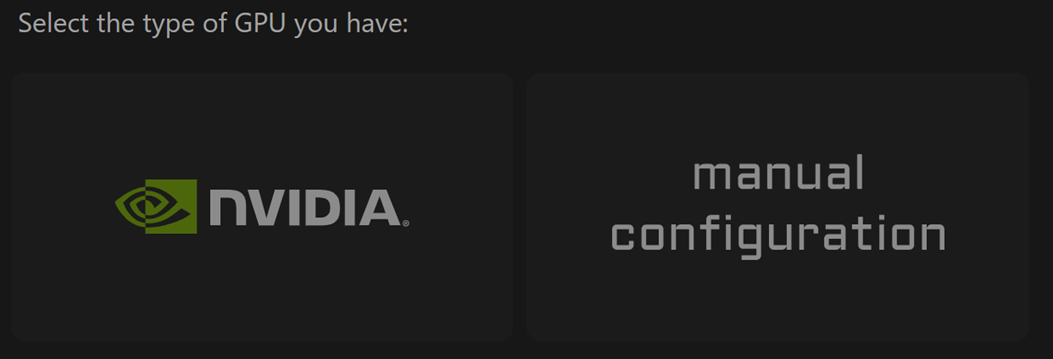
- NVIDIA: Highly recommended, properly supported. ComfyUI recommends only choosing another option if you’re a developer and absolutely certain an alternative option is the one you are intending to use.
- Manual Configuration: Requires manually installing and configuring python environment.
- CPU Mode: Not recommended and extremely slow. When this mode is selected, many strongly worded warning messages appear reiterating that this option should only be selected by users who are certain they intend to use CPU mode.

3. Select the installation location.
- The recommended installation location is an empty directory on an SSD with at least 15GB of disk space.
- If your SSD is designated as your D drive, some files will be installed on the C drive instead of the new directory on the SSD.
4. Optional: Migrate from an existing installation if one exists. This is helpful when switching from the Windows Portable version to the Windows desktop application. Model files won’t be copied, just linked to the desktop app.
5. Toggle the desktop settings to user preference.
- Automatic updates: Recommended
- Usage metrics
- Mirror settings: There should be a green check mark next to this option. If there is instead a red x mark, step 5 of the ComfyUI Windows guide details how to troubleshoot this issue.

6. Click the Install button!
macOS | Installation guide
1. Install the Mac version on the ComfyUI downloads page and open the installation package, then drag the application into the Applications folder. If the ComfyUI icon has the “prohibited” sign on it, then your current system is not compatible with the app. Find the ComfyUI icon in Launchpad.
2. Select the GPU setup.
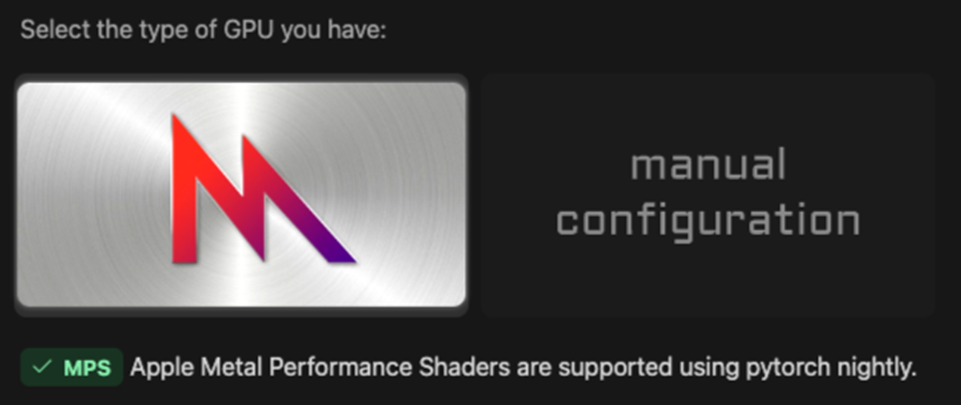
- MPS: Highly recommended, properly supported. ComfyUI recommends only choosing another option if you’re a developer and absolutely certain an alternative option is the one you are intending to use.
- Manual Configuration: Requires manually installing and configuring python environment.
- CPU Mode: Not recommended and extremely slow. When this mode is selected, many strongly worded warning messages appear reiterating that this option should only be selected by users who are certain they intend to use CPU mode.
3. Select the installation location.
- The recommended installation location is an empty directory on an SSD with at least 5GB of disk space.
- If your SSD is different from your operating system drive, some files will be installed in the operating system drive instead.
4. Optional: Migrate from an existing installation if one exists. Model files won’t be copied, just linked to the desktop app.
5. Toggle the desktop settings to user preference.
- Automatic updates: Recommended
- Usage metrics
- Mirror settings: There should be a green check mark next to this option. If there is instead a red x mark, step 5 of the ComfyUI Mac guide details how to troubleshoot this issue.
6. Click the Install button!
Windows Portable Installation
ComfyUI Portable is a standalone Windows build which is available for download on the Windows Portable installation guide (or on Github). It supports NVIDIA GPUs as well as CPU mode.
1. Download the zip file from either the installation guide or Github.
2. Extract the contents of the zip file. ComfyUI recommends using decompression software such as 7-ZIP; extracting with Windows’ default zip handler works as well, but it may be slower.
3. To launch, choose your hardware. The ``.bat`` files are located in the extracted folder.
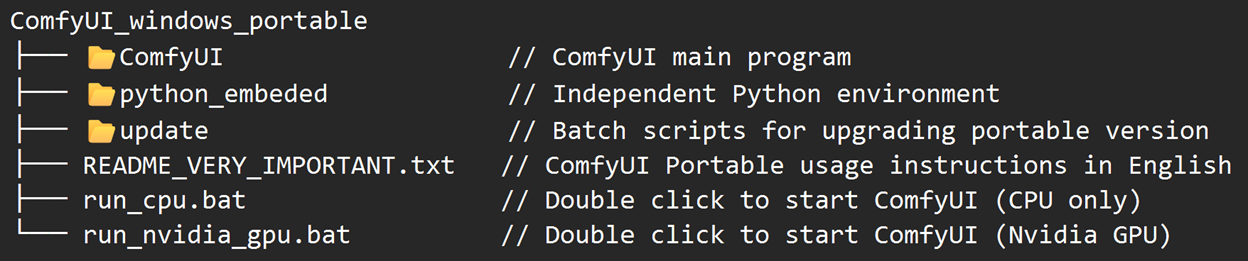
- NVIDIA GPU (not 50 series (Blackwell)): Double click ``run_nvidia_gpu.bat``
- NVIDIA 50 Series GPU: Read the system requirement information for NVIDIA 50 series on this page of the ComfyUI documentation.
- CPU only: Double click
run_cpu.bat
4. You will see a command running in Command Prompt.
- Once you see
To see the GUI go to: http://127.0.0.1:8188, ComfyUI has started. It may open your browser automatically, or you may have to navigate tohttp://127.0.0.1:8188(or whatever address is listed on your machine) manually. - Do NOT close the Command Prompt window or ComfyUI will stop running.
Manual Installation
Manual installation works on any (modern) operating system with any (modern) GPU. Fully detailed instructions can be found in the ComfyUI documentation (Windows Guide | Mac Guide | Linux Guide) as well as on Github, which can also be helpful for more in-depth troubleshooting or updates.
1. Clone the repository on Github:
2. Install Miniconda and create an environment.
- Python 3.13 is partially supported, but ComfyUI recommends Python 3.12.
3. Install GPU dependencies.
- NVIDIA:
- Alternatively, install PyTorch Nightly:
- AMD:
- Alternatively, install PyTorch Nightly:
- Mac ARM Silicon:
- For other GPUs, see the guide on Github.
4. Navigate into the ComfyUI directory.
5. Install the contents of requirements.txt.
6. Start the application!
Running ComfyUI Remotely
ComfyUI is a resource-intensive program that, realistically, may not run on many personal machines, especially those without a GPU. ComfyUI can also run on cloud platforms such as Google Colab or Beam.
Google Colab
In the repository, ComfyUI includes a Jupyter notebook with instructions for use on Google Colab, which is a Google cloud platform for running Jupyter notebooks with free/paid access to GPUs and TPUs. Here are some common tips when using the free version of Google Colab:
- Colab terminates idle sessions. Keep the session alive when desired by adding dummy cells which prevent Colab from idling.
- Free Colab notebooks are forcibly terminated after 12 hours of runtime regardless of activity level.
- GPU runtime limits/quotas aren’t public or consistent, but GPU access for the free tier is prioritized below GPU access of paid tiers, so to keep GPU usage low, change the runtime type to CPU when you aren’t running ComfyUI.
Beam
By far the easiest option presented in this article is launching ComfyUI on Beam, a cloud platform that makes deploying models and launching programs fairly painless.
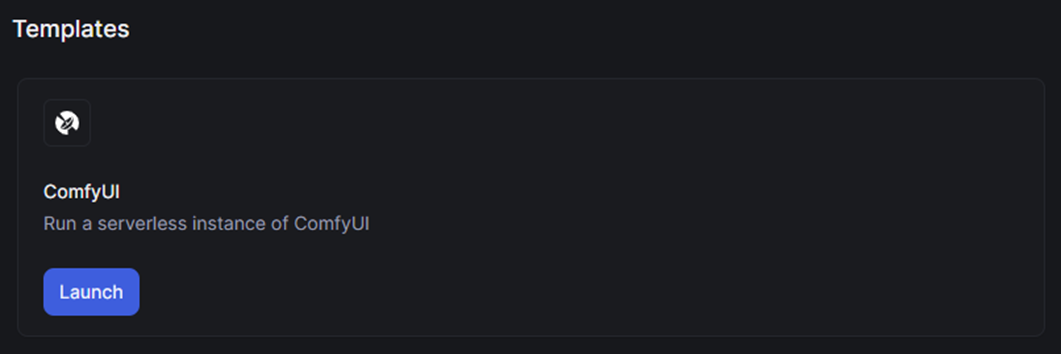
To get started, make an account, complete the onboarding (optional), navigate to Templates, and select “Launch” on ComfyUI.
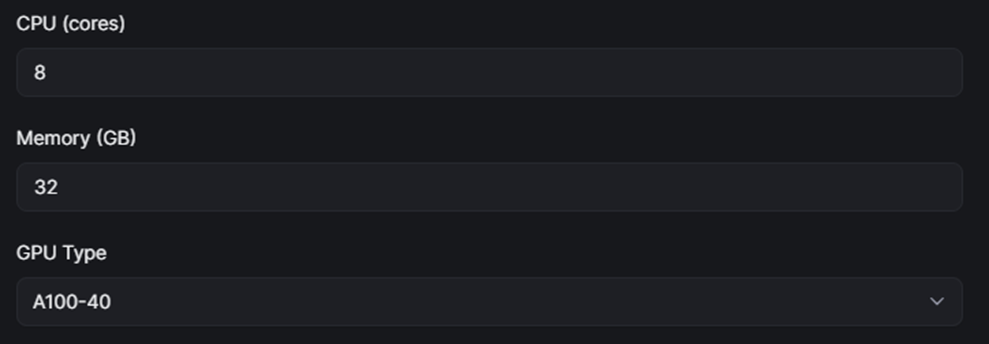
You can toggle the hardware used to optimize for compute time and cost.
Make sure you stop the container at the end of the session.

Recap and Resources
ComfyUI, while a powerful tool for many generative AI workflows, can be tricky to install. Below is a list of resources if you run into issues:
- ComfyUI resources:
- ComfyUI Documentation
- ComfyUI Github
- Desktop/portable installation guides: Windows app | Mac app | Windows portable
- Manual installation guides: Windows Guide | Mac Guide | Linux Guide
- Dependencies resources:
- Remote resources:
- Google Colab resources page and ComfyUI’s Jupyter notebook
- Beam documentation
Common ComfyUI Installation Problems
GPU or accelerator not supported
This usually means your PyTorch install does not match your hardware. On NVIDIA systems, update your GPU driver and install a CUDA-compatible PyTorch build. On Apple Silicon, use the macOS/Metal-supported path. On Linux AMD systems, check ROCm support for your GPU.
Missing custom nodes
Many downloaded workflows depend on custom nodes. Install ComfyUI Manager to identify and install missing nodes more easily.
Missing models or checkpoints
Workflow templates may require model files that are not included by default. Download the required .safetensors or checkpoint files and place them in the expected ComfyUI/models directory.
CPU-only mode is too slow
CPU mode is useful for verifying installation, but it is not practical for most real image or video workflows. Use a local GPU or cloud GPU for larger workflows.
When to Run ComfyUI on a Cloud GPU
If you are installing ComfyUI to run larger image, video, or upscaling workflows, local hardware can become the bottleneck. A serverless GPU or cloud GPU setup can be easier for repeatable jobs, batch generation, or workflows that need more VRAM than your laptop or workstation has.
For workflow examples to try after installation, see the ComfyUI workflow guide and the serverless GPU provider comparison.